
In today's digital world, photo editing has become a crucial part of photography. Whether you're a professional photographer or just starting, learning basic photo editing can significantly enhance your work. Adobe Photoshop is a powerful photo editing tool that is popular, but it can be challenging for beginners to use. This manual will assist you in grasping the fundamentals of photo editing using Adobe Photoshop, including key tools and simple retouching methods.
Understanding the Basics
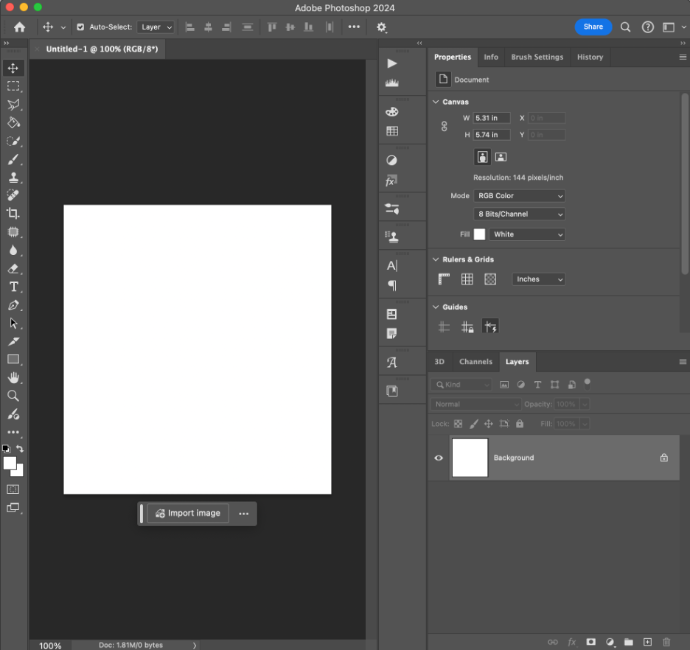
Before starting photo editing, it's important to learn the basic tools and functions of Adobe Photoshop. Knowing your way around the workspace, layers, and tools will make the editing process much smoother.
Start using Photoshop
When you first open Photoshop, you'll see a lot of different panels and tools. Don't worry, it will all make sense with a little practice. Here are some key parts of the Photoshop workspace:
- Toolbar: Located on the left side, this is where you'll find most of the tools you'll use for editing.
- Options Bar: This bar at the top changes depending on the tool you have selected, showing options for that specific tool.
- Layers Panel: Found on the right side, this is where you manage the layers of your image. Layers let you work on different parts of your image separately.
- Menu Bar: At the top, this bar has all the menus for different commands and settings.
Basic Tools You Need to Know
Let's start with some of the most important tools for beginners:
- Crop Tool: Use this tool to trim and resize your image. It's great for removing unwanted elements and improving the composition of your photo. To use it, select the Crop Tool from the toolbar, then drag the corners of the crop box to resize your image. Press Enter to apply the crop.
- Adjustment Layers: These allow you to edit your photo without permanently changing it. You can adjust brightness, contrast, saturation, and color balance. To add an adjustment layer, click on the half-black, half-white circle icon at the bottom of the Layers panel. Next, select the adjustment you want to make. Then choose the adjustment you want to make.
- Healing Brush Tool: Perfect for removing blemishes, wrinkles, and other imperfections from your photos. To use it, select the Healing Brush Tool, hover over the area you want to fix, and click. Photoshop will blend the area with the surrounding pixels.
- Clone Stamp Tool: This tool lets you copy an area from one part of an image to another. It's useful for removing larger objects or distractions. To copy an area, use the Clone Stamp Tool. Hold the Alt key, click on the area to copy, then paint over the area to replace.
- Dodge and Burn Tools: These tools are used to selectively lighten or darken an area of the image. The Dodge Tool lightens, while the Burn Tool darkens. They're great for enhancing shadows and highlights to add depth and dimension to your photos.
Image Editing Techniques
As a beginner, it's best to start with simple retouching techniques. Here are some tips to help you get started:
Focus on Lighting
Lighting is one of the most important aspects of photography. Good lighting can make a photo look professional, while poor lighting can ruin an otherwise great shot. Use the Dodge and Burn tools to enhance shadows and highlights for a more dynamic look. For example, you can use the Dodge Tool to brighten the highlights on a person's face and the Burn Tool to deepen the shadows, creating more depth and dimension.
Skin Retouching
If you're editing portraits, you'll want to know how to retouch skin. Use the Healing Brush Tool to remove blemishes, acne, and other imperfections. Simply select the Healing Brush Tool, then click on the imperfections you want to remove. Photoshop will automatically blend the area with the surrounding skin.
Color Correction
Color correction is essential for making your photos look their best. Use Adjustment Layers to fine-tune the colors in your photos. You can adjust the brightness, contrast, saturation, and hue to achieve the desired look. For example, if your photo looks too yellow, you can use a Color Balance adjustment layer to add more blue and balance out the colors.
Sharpening
Sharpening your photos can enhance details and make them appear crisper and clearer. You can use the Sharpen Tool or apply a sharpening filter. To use a sharpening filter, go to the Filter menu, choose Sharpen, and select Unsharp Mask. Adjust the Amount, Radius, and Threshold sliders until your photo looks sharp without being overdone.
Practice, Practice, Practice
Practice photo editing to improve skills, don't fear mistakes, experiment with tools, and try various techniques on different photos.
Detailed Steps for Basic Photo Editing
Now that you know the basics, let's walk through a simple photo editing process step by step.
Step 1: Open Your Image
Start by opening Photoshop and loading the photo you want to edit. Go to the File menu, select Open, and choose your image file.
Step 2: Crop and Straighten
Use the Crop Tool to trim and straighten your photo. Select the Crop Tool from the toolbar, drag the corners of the crop box to resize your image, and press Enter to apply the crop. If your photo is crooked, you can straighten it by rotating the crop box.
Step 3: Adjust Brightness and Contrast
Add an Adjustment Layer to adjust the brightness and contrast. Click the half-black, half-white circle icon at the bottom of the Layers panel and choose Brightness/Contrast. Move the sliders to brighten or darken your photo and increase or decrease the contrast.
Step 4: Remove Imperfections
Use the Healing Brush Tool to remove blemishes and other imperfections. Select the Healing Brush Tool from the toolbar, then click on the areas you want to fix. Photoshop will blend the area with the surrounding pixels.
Step 5: Enhance Colors
Add another Adjustment Layer to enhance the colors. Click the half-black, half-white circle icon at the bottom of the Layers panel and choose Hue/Saturation. Move the sliders to adjust the hue, saturation, and lightness of your photo.
Step 6: Sharpen the Image
To sharpen your photo, go to the Filter menu, choose Sharpen, and select Unsharp Mask. Adjust the Amount, Radius, and Threshold sliders until your photo looks sharp.
Step 7: Save Your Edited Photo
Once you're happy with your edits, save your photo. Go to the File menu, select Save As, and choose a file format and location for your edited image.
Tips for Improving Your Photo Editing Skills
Here are some additional tips to help you improve your photo editing skills:
Learn from Tutorials
There are countless tutorials available online that can teach you new techniques and tips for using Photoshop. Websites like YouTube and Adobe's official site have many tutorials for beginners. Watching tutorials can give you new ideas and help you learn more advanced techniques.
Use Keyboard Shortcuts
Learning keyboard shortcuts can save you a lot of time and make your editing process more efficient. For example, pressing Ctrl+Z (Cmd+Z on Mac) undoes your last action, and pressing Ctrl+J (Cmd+J on Mac) duplicates the selected layer.
Keep Your Workspace Organized
An organized workspace makes editing easier and faster. Arrange your panels and tools in a way that works best for you. You can also save your workspace layout by going to the Window menu, selecting Workspace, and choosing New Workspace.
Experiment with Different Styles
Don't be afraid to try different editing styles. Experimenting with various techniques and effects can help you discover your unique editing style. You might find that you prefer a certain look, such as bright and colorful or dark and moody.
Join Online Communities
Joining online communities can be a great way to learn from others and get feedback on your work. Websites like Reddit, Facebook, and photography forums have groups and discussions where you can share your photos, ask for advice, and learn from other photographers.
Improving your images is possible with Adobe Photoshop. This guide has covered the basics of photo editing, including essential tools and simple retouching techniques. Start with basic retouching, practice consistently, and develop your skills to create high-quality photos that showcase your unique style. Remember, practice is key to becoming proficient in photo editing. So, don't be afraid to experiment and learn from your mistakes. Happy editing!